Applications

Periodontal Splint
Ribbond is perhaps best known for making periodontal splints. Ribbond splints are strong, highly bondable and esthetic. A Ribbond splint takes less time than traditional methods, is more esthetic, less bulky and exceptionally failure resistant.Watch the Video
This video shows a mandibular splint that is placed on the lingual surfaces of the teeth. For maxillary splints, we recommend bonding the Ribbond into a small groove prepared on the facial.
Technique
Optional tooth preparation


If desired, the splint can be buried by cutting a channel in the teeth at the level of the interproximal contacts and placing the Ribbond at the base of the channel. This will make it more resistant to debonding and will maximize the longevity, esthetics and comfort of the splint.
If choosing not to make a channel preparation, prevent the terminal ends of the splint from being exposed over time by cutting a depression in the enamel towards the distal of the fossa of the terminal teeth. When adapting the Ribbond to the teeth, tuck the terminal ends into these depressions.
Step 1
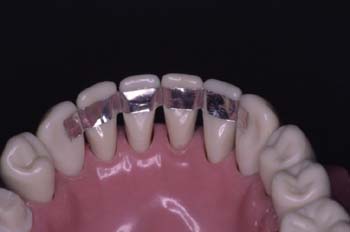
Measure the teeth and cut the Ribbond. Make a pattern by closely adapting a piece of tinfoil or dental floss to the teeth. Tuck the pattern into the interproximal contacts in the same manner as the Ribbond will be adapted
Use cotton pliers to remove the Ribbond from the package and cut to the measured length. Place the cut piece on a clean surface until ready to use.
Step 2
Prepare lingual surfaces and labial interproximals for bonding. Clean the teeth with a sandblaster or prophy jet or use a diamond burr to roughen the enamel prior to cleaning. Finishing strips should be used to clean the interproximals. Prepare the teeth for bonding in your standard manner (pumice, acid-etch, and apply a thin layer of bonding adhesive).
Optional block-out and stabilization technique
After acid etching, apply a vinyl polysiloxane block-out gingival to the area to be splinted. This stabilizes the teeth during splint construction and makes clean up easier. Photos in these instructions show this block-out technique.
Note: Overhead operatory lights can cause premature setting of light-cured composites. Since the following steps involve light-cured composites, consider turning off the operatory light.
Step 3
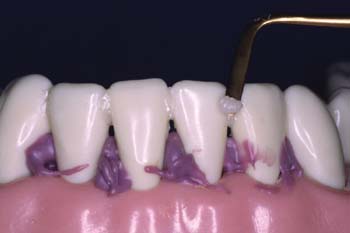
Measure the teeth and cut the Ribbond. Make a pattern by closely adapting a piece of tinfoil or dental floss to the teeth. Tuck the pattern into the interproximal contacts in the same manner as the Ribbond will be adapted
Step 4
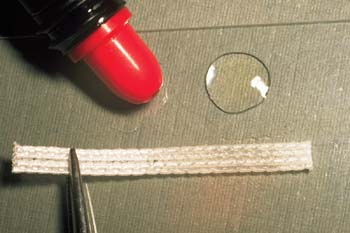
Wet the Ribbond with resin. Wet the Ribbond with unfilled bonding adhesive, composite sealant or pit and fissure sealant and blot off the excess with a lint free gauze or patient bib. The wetted Ribbond may now be touched with powder free gloves or clean fingers. Do not cure yet.
Note: We prefer not to use one-step or fifth-generation resins to wet the Ribbond because these materials contain acids or acetone that must be evaporated. If using these materials, blot off the excess resin with lint-free gauze and then holding the Ribbond with cotton pliers, evaporate the solvent with the air syringe.
Step 5
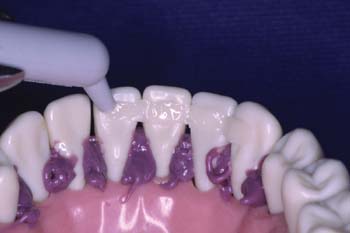
Apply filled composite to the teeth. Apply a thin layer of paste-like, medium viscosity, translucent composite resin at the level of the contact area. A Centrix syringe makes application easier. Do not cure yet.
Step 6
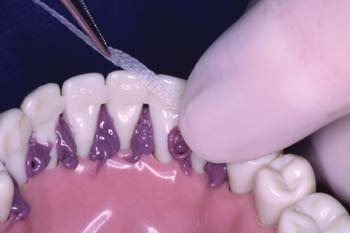
Adapt the Ribbond. Holding the wetted Ribbond with cotton pliers, position one end of the Ribbond against the composite on the tooth. Press the Ribbond through the composite with your finger or an instrument
Step 7
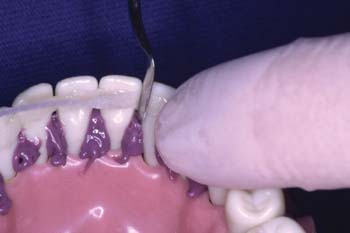
Adapt the Ribbond in the interproximal contact. To avoid pulling out the Ribbond that has already been adapted, hold the adapted part in position with a finger or an instrument. Place the Ribbond deep into the adjacent interproximal contact with an instrument. Continue until the entire length is adapted. Do not cure yet.
Step 8
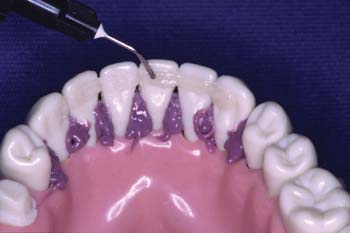
Cover the Ribbond splint with a flowable composite. Using a syringe or an applicator brush, cover the splint with a flowable composite. Make the covering layer as smooth as possible prior to curing.
If a flowable composite is not available, apply a thin layer of filled composite resin over the splint and smooth it with a washed, gloved finger that has been wetted with unfilled bonding adhesive.
Note: If a channel preparation is used, cover the Ribbond with a filled composite resin. Light-cure the covering layer of composite.
Step 9
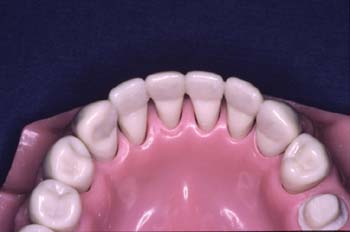
Check occlusion, finish and polish. Remove excess composite and polish with a composite-resin polishing paste.
Ribbond does not polish well. Do not cut into Ribbond fibers.
The finished splint is thin, comfortable and esthetic
Single-Visit Bridge
Ribbond single-visit bridges provide strength, durability, and immediate convenience. Ribbond bridges are cost effective and reliable. Excellent for emergencies, implant temporization, congenitally missing laterals and patients who cannot afford conventional lab fabricated bridgework. Use natural tooth, denture tooth, or composite build-up.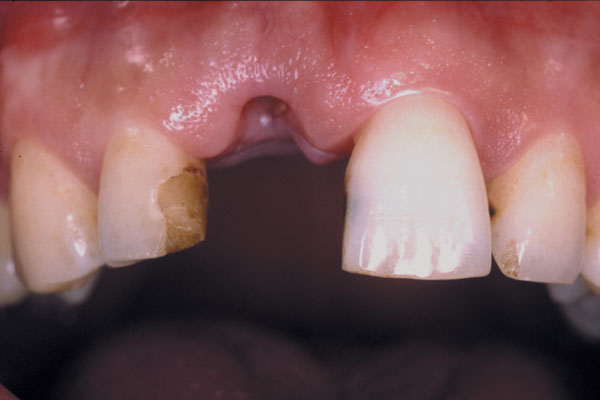
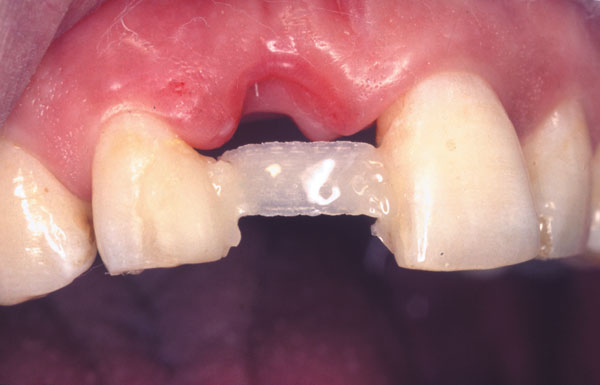
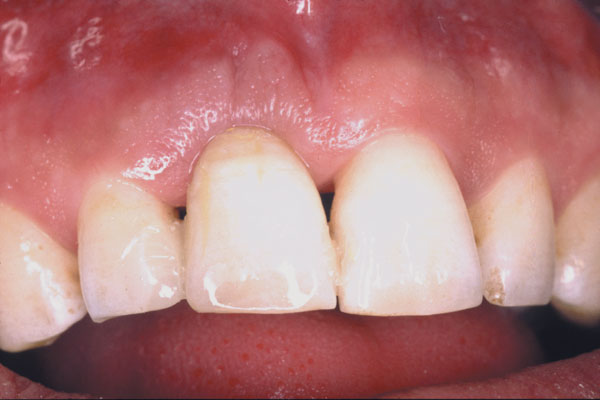
Watch the Video
Technique
If clearance permits, a bridge can be made without preparation of the abutments. If there is not adequate space, shallow preparations might be necessary. The following shows the construction of a long-term bridge framework. For provisional bridges one layer of Ribbond can be used.
Making Ribbond Framework
Step 1
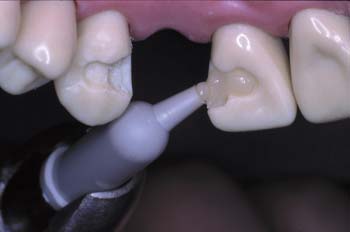
Prepare teeth for bonding and place a thin layer of composite on the teeth.
Step 2
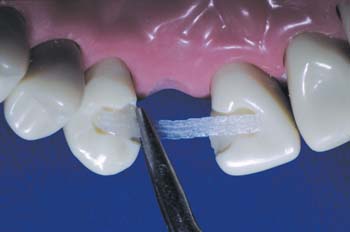
Wet the Ribbond with bonding resin and place it spanning from one abutment to the other. Place the Ribbond so that it will be under the incisal edge of the pontic. Remove excess composite and cure.
Step 3
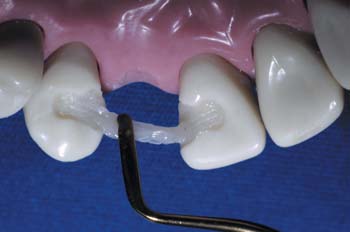
Place a thin layer of composite lingual to the first piece of Ribbond in the pontic section of the Ribbond framework.
Step 4
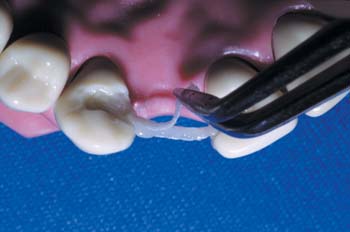
Wet a second piece of Ribbond and place it against the composite in the pontic section of the framework. Cure.
Step 5
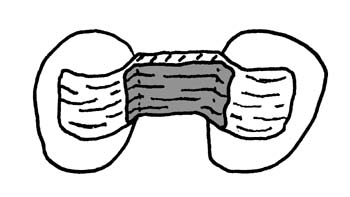 0.5 to 0.75mm composite layer in the middle
The second Ribbond layer attaches over the first composite layer only to the proximal lingual angles of the teeth adjacent to the pontic.
Step 6
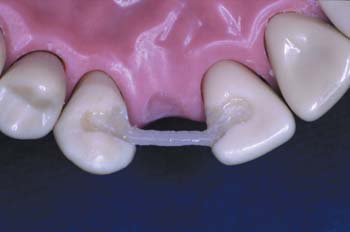
Cover Ribbond on abutments with composite. Cure.
Building Pontic
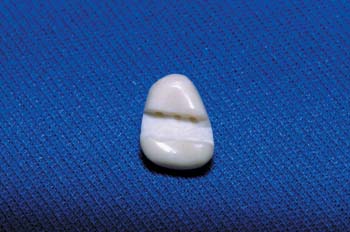
Natural Tooth
- Cut off the root of the extracted tooth and fill pulp chamber with composite.
- Ribbond framework.
- Prepare an undercut lingual groove on the extracted tooth.
- Bond natural tooth pontic to Ribbond framework with composite.
Denture Tooth
- Choose and shape denture tooth to fit in the edentulous area.
- Build Ribbond framework.
- Prepare an undercut lingual groove in denture tooth to fit the Ribbond framework.
- Use a small round burr to drill small holes in the pontic for extra mechanical retention. Sandblast groove for better mechanical retention.
- Bond denture tooth to pontic with composite.
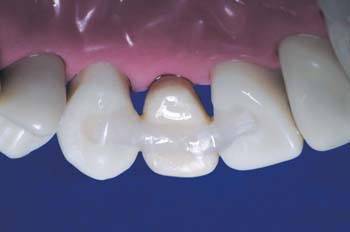
Composite Buildup
- Build Ribbond framework.
- Build composite pontic onto Ribbond framework using standard composite technique.
Finished Bridge
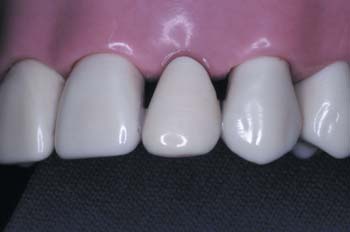
Fiber Reinforced Composite Restoration
Watch the Video
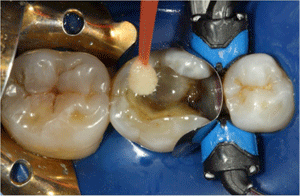
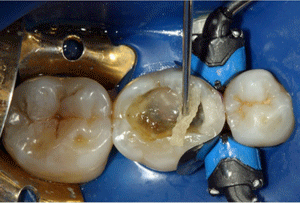
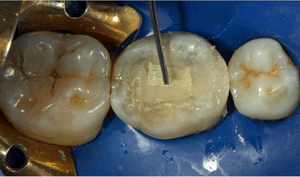
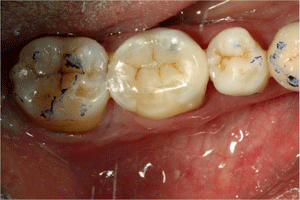
Here are two presentations by Dr. Graeme Milicich presented at the Academy of Biomimetics annual meetings.
- A Ribbond-direct Composite on an Endo premolar
- A technique discussion on Ribbond cores for premolars and molars
Why and how Ribbond composite restorations work
Published research articles confirm that incorporating Ribbond into composite restorations provides the following benefits:
-
INCREASED MICRO-TENSILE BOND STRENGTH
The micro-tensile bond strength of the composite is significantly increased when Ribbond is closely adapted and bonded against the cavity walls. -
MITIGATING THE HARMFUL EFFECT OF C-FACTOR
The increased micro-tensile bond strengths decreases the negative c-factor effects. This phenomenon is especially evident with deep and narrow Class I restorations.
-
MINIMIZES POLYMERIZATION AND DECREASES SHRINKAGE AND LEAKAGE
Polymerization shrinkage can result in leakage, and sensitivity. Closely lining the preparation with Ribbond significantly reduces and minimizes these harmful effects of polymerization shrinkage. Because the Ribbond is closely adapted to the cavity walls, there is less volume of composite to shrink and less polymerization shrinkage results in less leakage and less sensitivity.
-
BRIDGING CRACKS ON PULPAL FLOOR
Ribbond bridges the cracks that are commonly seen in the pulpal floor of old amalgam restorations. Ribbond acts like staples across the cracks and holds the parts of the tooth on both sides of the crack together.
-
RELIEVES CAUSES OF SYMPTOMS OF SPLIT TOOTH SYNDROME
Split tooth syndrome has been predictably successfully relieved when Ribbond has been used as a buccal-lingual cross cusp splint under the occlusal surface to bridge cracks. The cross cusp Ribbond splint prevents the parts of the split tooth from moving.
-
INCREASED FRACTURE TOUGHNESS
Ribbond fiber reinforcements greatly increases the fracture toughness of dental composite restorations. Ribbond’s unique combinations of fixed nodal intersections and tough ultra-high molecular weight polyethylene fibers inhibits and prevents crack propagation it composite resin.
-
STRESS DISTRIBUTION AND ENERGY ABSORPTION MECHANISM
Ribbond acts as a stress distribution and energy absorption mechanism. It minimizes the stress concentrations by distributing forces over a greater area, which prevents crack formation and propagation. It also absorbs the energy from repeated occlusal impacts.
-
FAIL-SAFE DESIGN.
Studies demonstrate that if a crack starts in a Ribbond lined composite restoration, the crack is redirected. If this crack leads to failure, the restoration/tooth complex fails safely and the tooth can be retreated. In the case of standard composite restorations techniques; when the restoration/tooth complex fails, it tends to fail catastrophically and the tooth must be extracted.
The links below reference published studies supporting these performance characteristics.
Technique
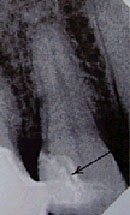
Based on work by Jon C. Karna, DDS, "Conservative Treatment of Cracked Tooth Syndrome", Dental Products Report, September 2000.
Prepare cracked tooth
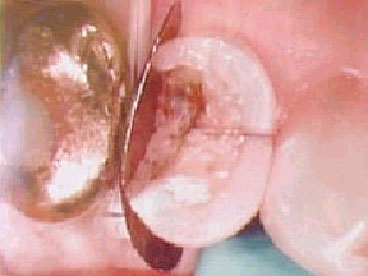
- Reduce occusal surface at least 1.5 mm. Inadequate cuspal reduction can lead to premature wear and exposure of the reinforcing fibers within the composite resin.
- Treat crack.
- Prepare for bonding
Adapt a piece of Ribbond in mesio-distal direction
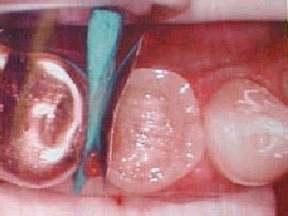
- Use your standard bonding procedure and place a layer of flowable composite on tooth.
- Use widest piece of Ribbond possible. In this case the 4 mm Ribbond-THM was used.
- Place bonding resin on the Ribbond.
- Press the Ribbond through the composite and against the pulpal floor and distal-axial wall of the tooth.
- Hold the fiber in place and cure.
Prepare cracked tooth
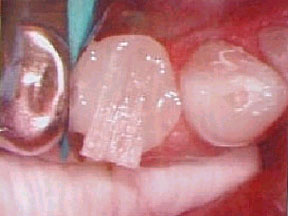
- Apply flowable composite over the already adapted Ribbond.
- Press a second piece of Ribbond through the composite in the buccal-lingual against the first piece and the tooth. Use widest piece possible. This constrains cuspal flexion.
- Cure.
Cover with wear-resistant hybrid resin
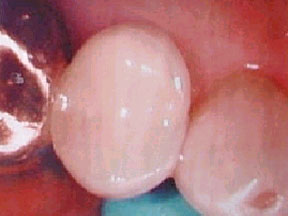
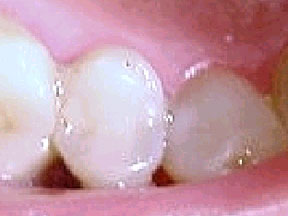
15 month follow up
Orthodontic Retainer
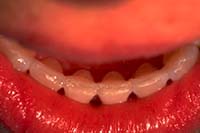
For post orthodontic retainers with 1/2 mobility or less, Ribbond offers the Orthodontic Ribbond. Using the same technique for making a periodontal splint, it is possible to make low bulk, bondable and esthetic retainers.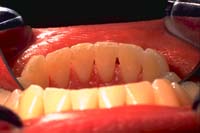
Technique
Step 1
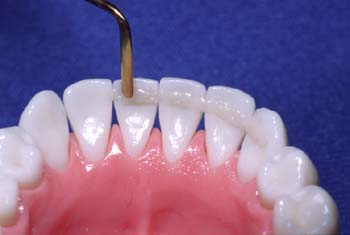
Prepare the teeth for bonding using your standard bonding procedure. Apply a thin layer of a paste composite at the level of the interproximal contacts.
Step 2
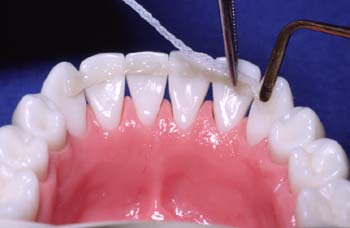
Wet the Ribbond with unfilled bonding resin (sealant). Adapt the Ribbond into the composite. Like a bonded bracket, the fixed Ribbond retainer must be closely laminated against the tooth.
Step 3
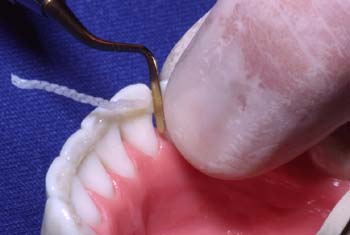
Hold the adapted Ribbond against the tooth with your finger. Use an instrument to place the Ribbond into the interproximal contacts closely against the adjacent teeth. Continue one tooth at a time until the entire Ribbond retainer is placed.
Step 4


The placement of a Ribbond retainer is different than a wire. The Ribbond is closely adapted against the teeth and deep into the interproximal contacts.
Step 5
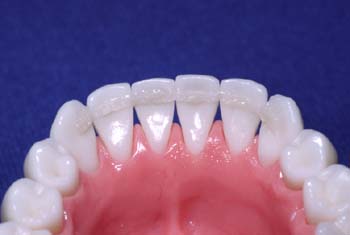
After placement, remove extra composite and cure.
Step 6
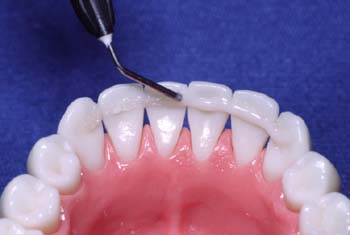
Using applicator brushes, instruments or needle tipped syringes apply a thin coat of flowable composite over the Ribbond. Cure.
Step 7
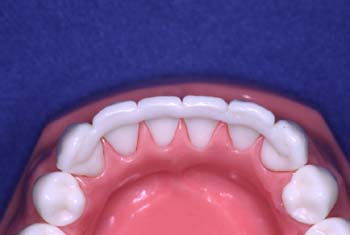
Esthetic and comfortable, the Ribbond retainer is complete.
Diastema Closure Maintenance
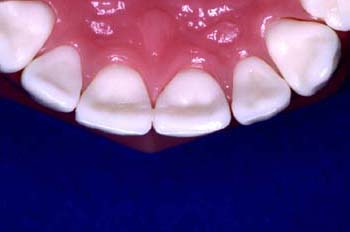
- Esthetic — No gray show-through
- Durable — Does not harden and fracture like wire
Step 1
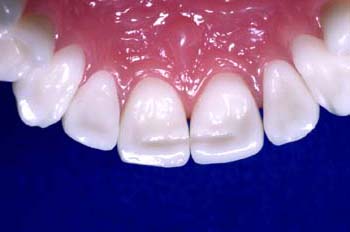
Cut a shallow preparation in the teeth with a #4 round diamond, at the level of the interproximal contacts, and prepare teeth for bonding.
Step 2
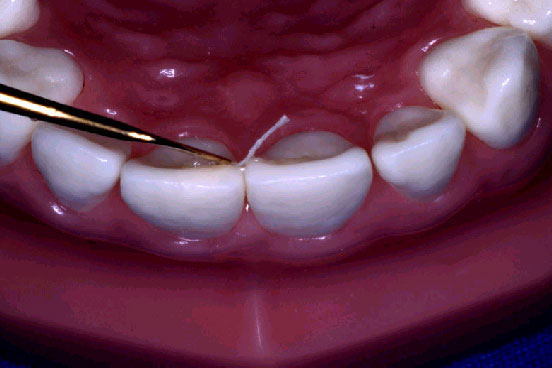
Place a thin layer of paste composite in the preparation. Wet the Ribbond with bonding resin and press the Ribbond through the composite and against the base of the preparation.Cure.
Step 3
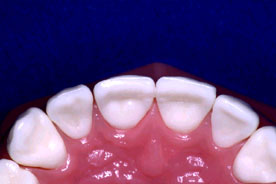
An additional layer of composite is applied so that the retainer is flush with the surrounding tooth structure.The finished retainer "disappears" within the composite and has no bulk
Step 4
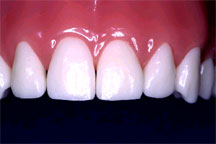
Unlike a metal wire Ribbond offers superior esthetics and is not visible.
Reinforcing Acrylic Orthodontic Appliances
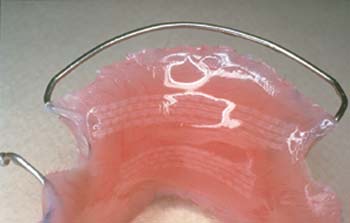
Ask your laboratory to include Ribbond to prevent fracture failures.
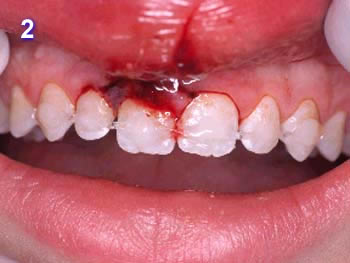
Trauma Stabilization
Ribbond is perhaps best known for making periodontal splints. Ribbond splints are strong, highly bondable and esthetic. A Ribbond splint takes less time than traditional methods, is more esthetic, less bulky and exceptionally failure resistant.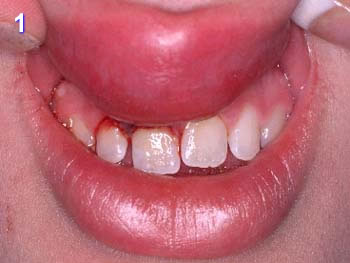
Technique
Step 1
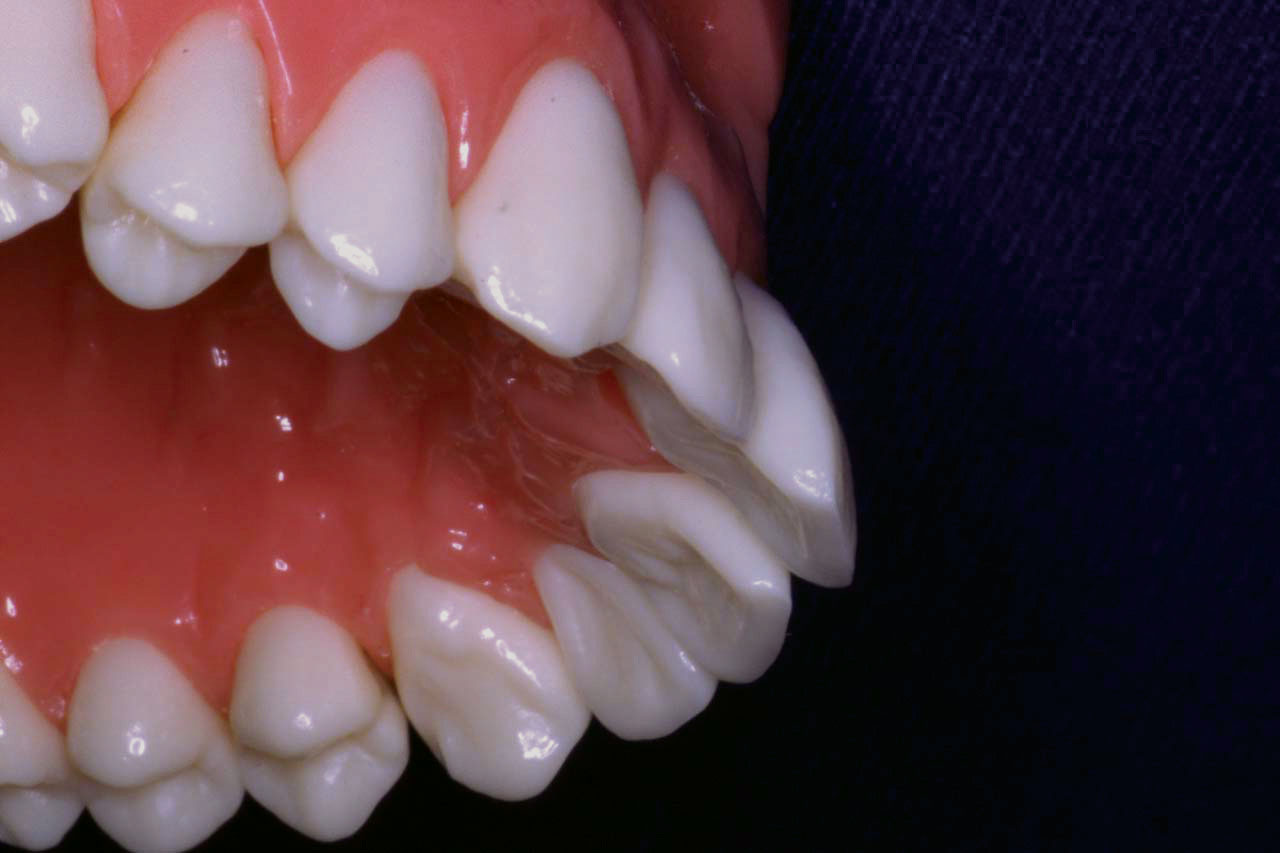
Gently reposition the avulsed or luxated tooth.
Step 2
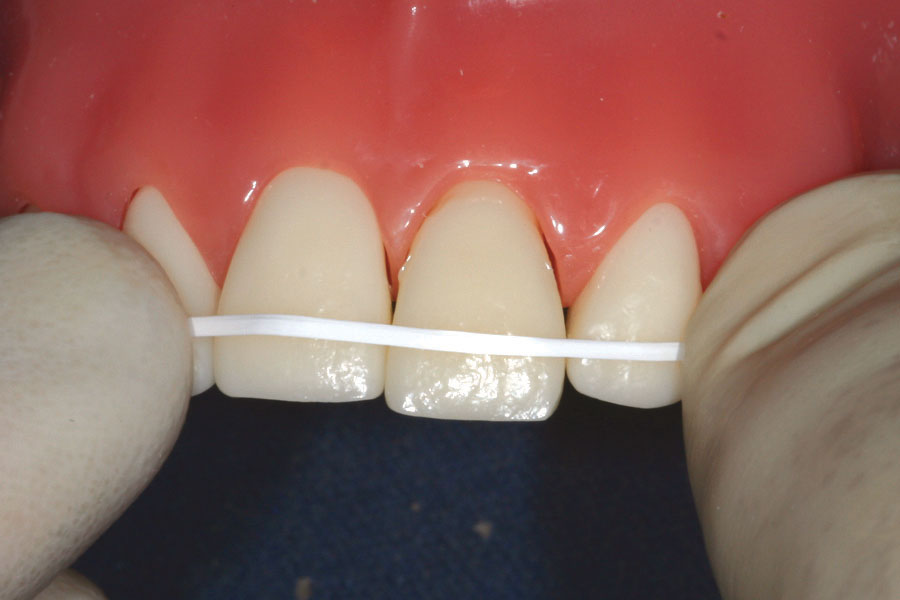
Measure the length of Ribbond needed with dental floss. The Ribbond should extend to 3/4 of the distance across the abutments at the level of interproximal contacts.
Step 3
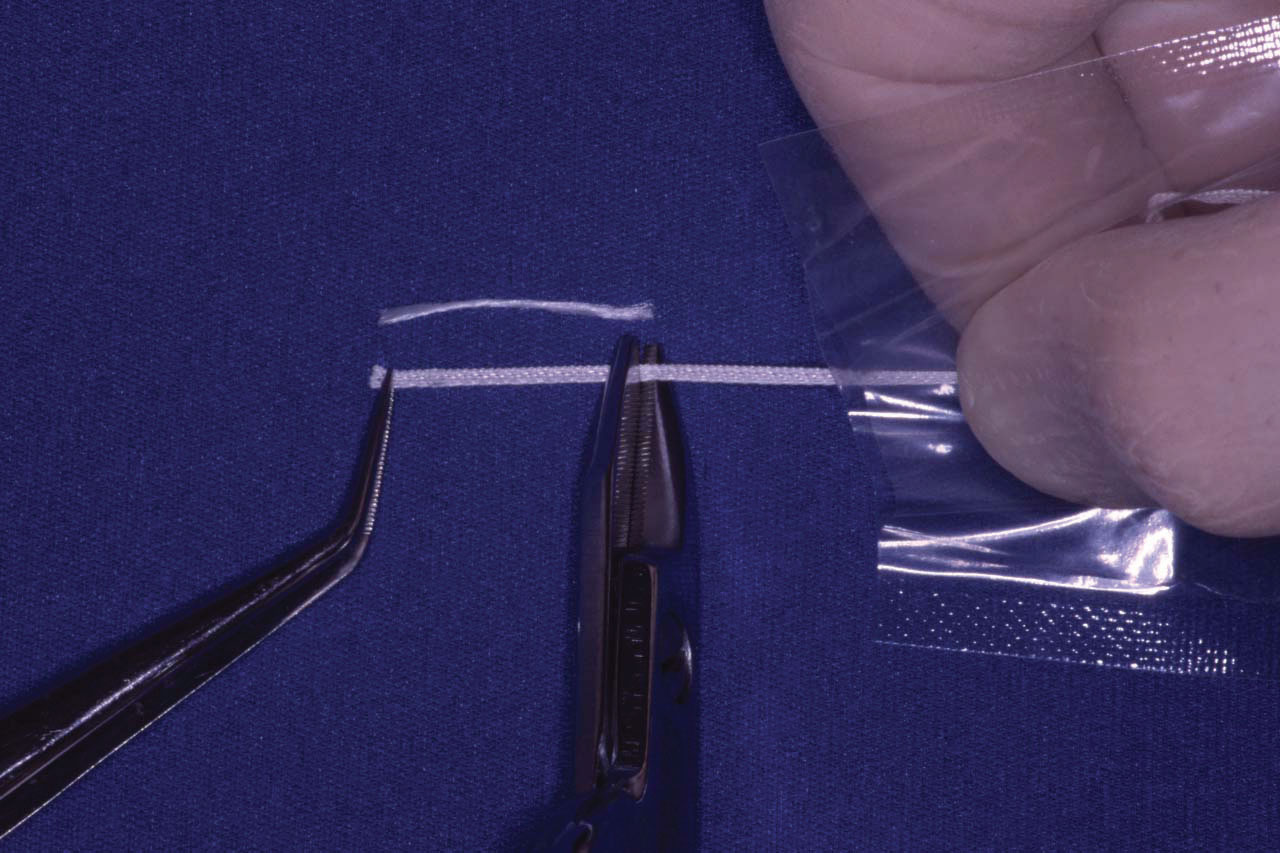
Remove the Ribbond from the protective plastic sleeve with cotton pliers. Cut the Ribbond to the length of the dental floss template.
Step 4
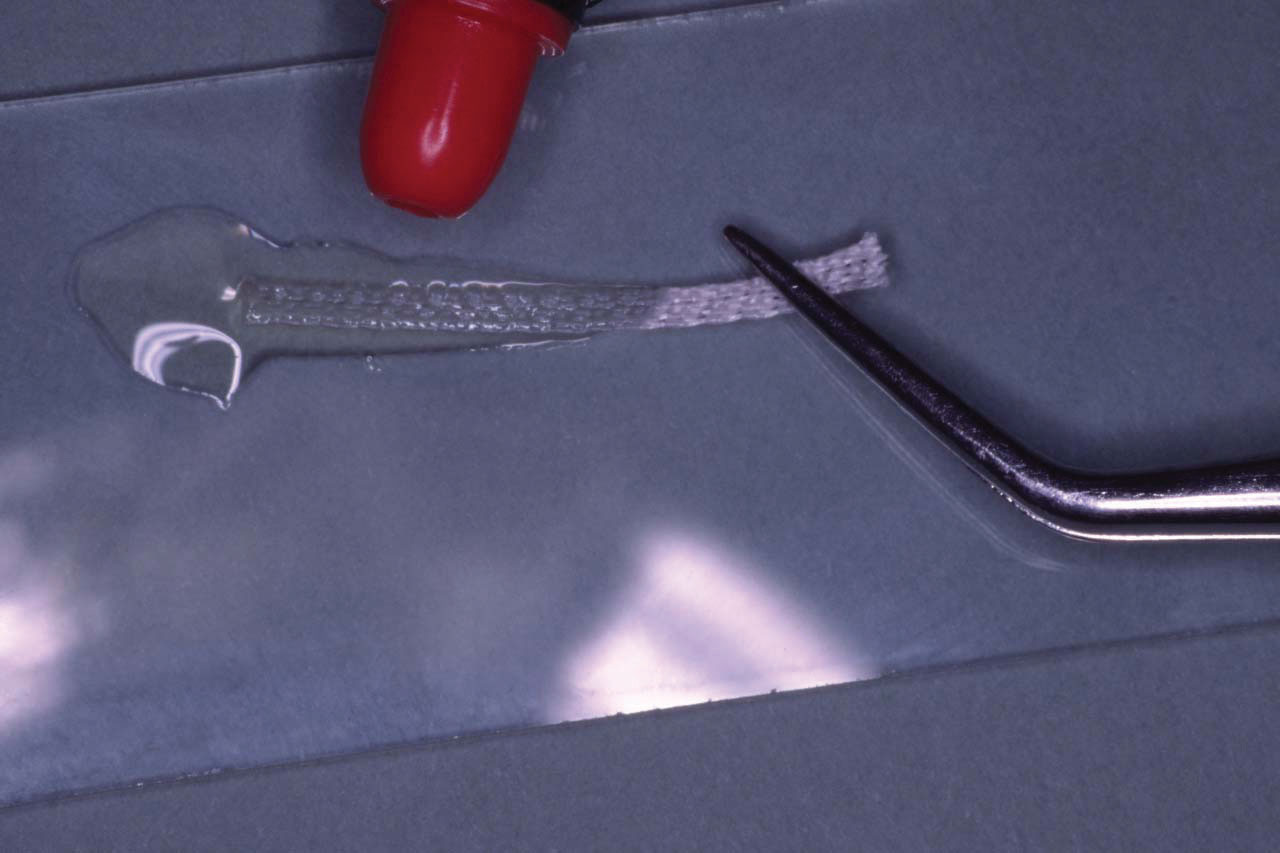
Wet the Ribbond with unfilled bonding adhesive or pit and fissure sealant. Blot off the excess with a lint free gauze or patient bib. The Ribbond may now be touched with powder free gloves or clean fingers.
Step 5
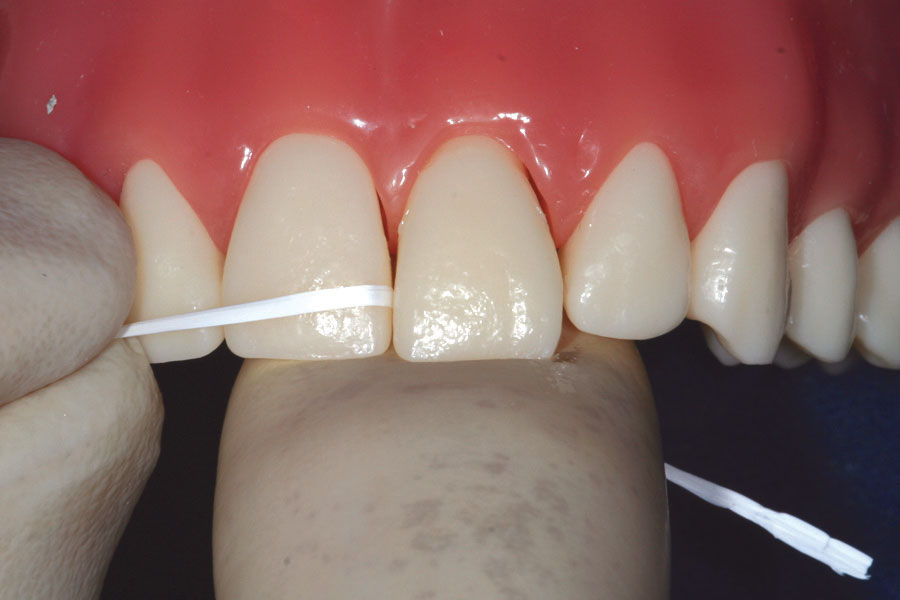
Use waxed dental floss to contaminate the interproximal contacts of both the abutments and the traumatized tooth. This will prevent composite from bonding at the contacts.
Step 6
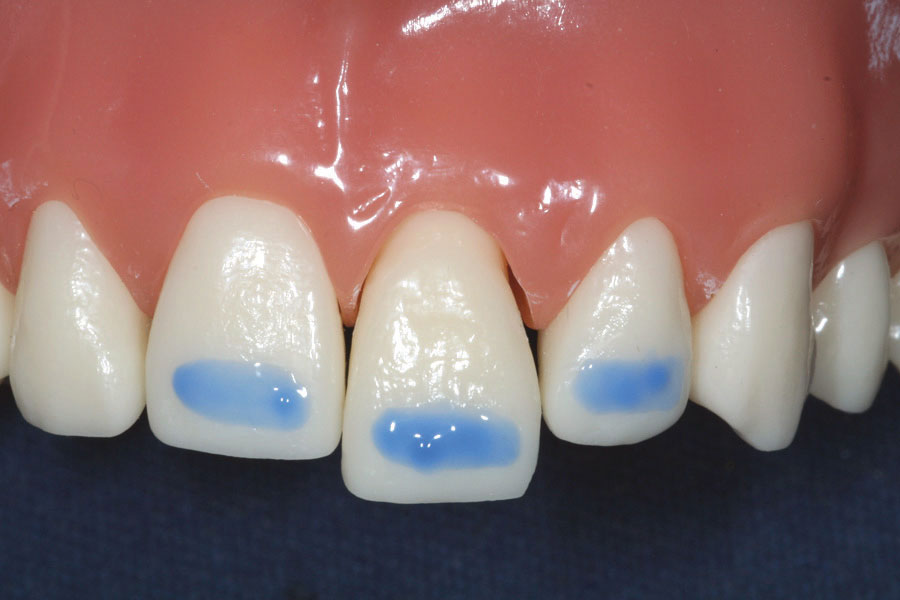
Clean and etch the teeth at the level of the interproximal contacts. To maximize ease of removal, etch only enough surface area necessary for retention. Apply a bonding resin and cure. To insure semi-rigidity, do not etch or bond in the interproximal region.
Step 7
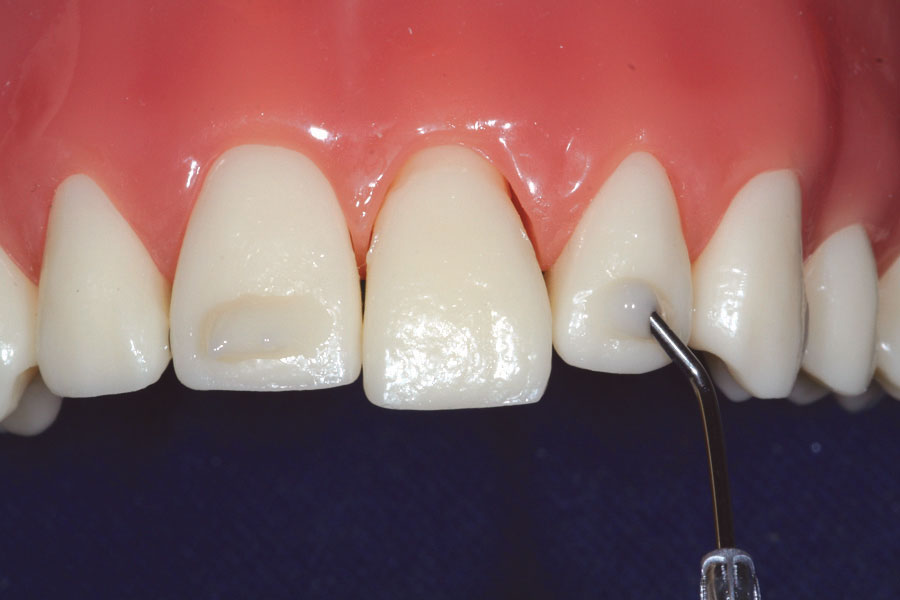
Apply a minimal amount of filled composite on the teeth. Do not place any composite at the contacts.
Step 8
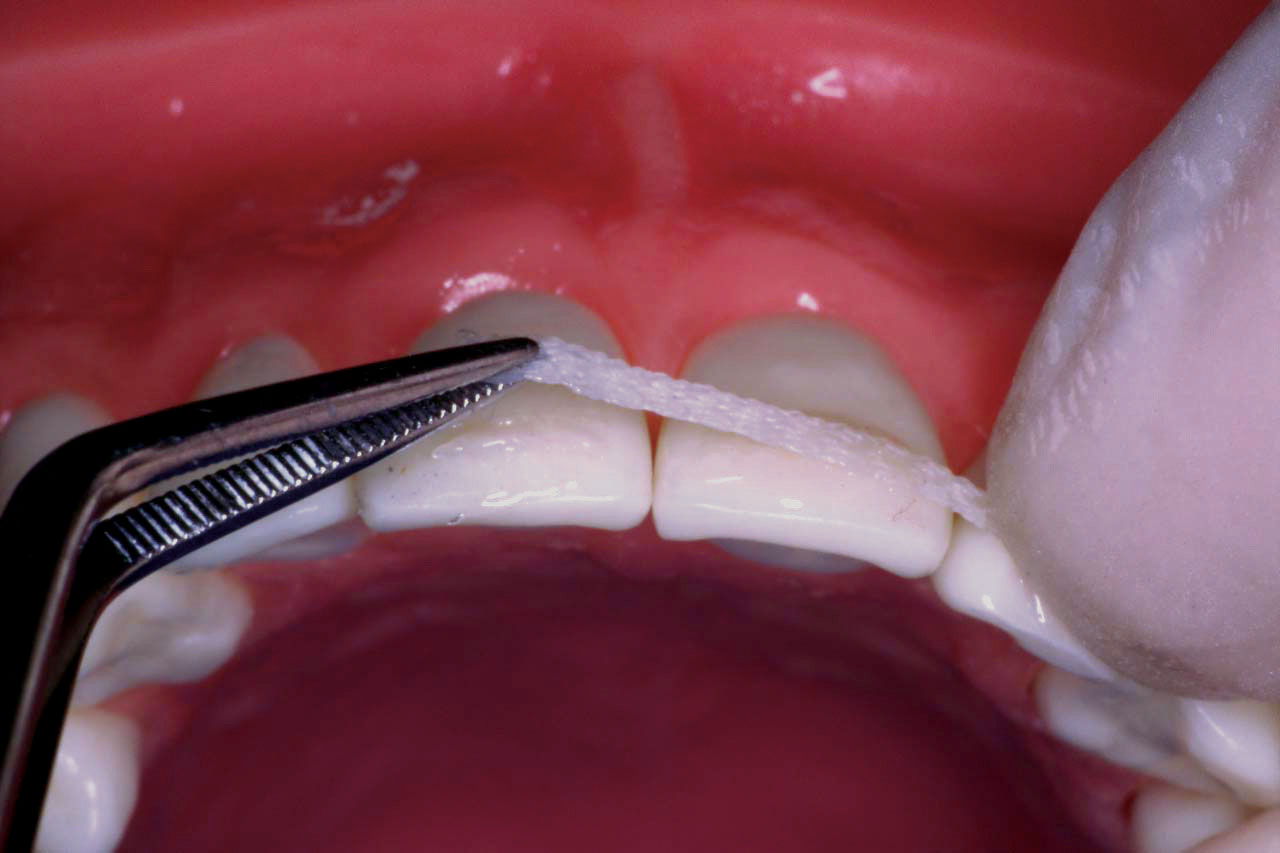
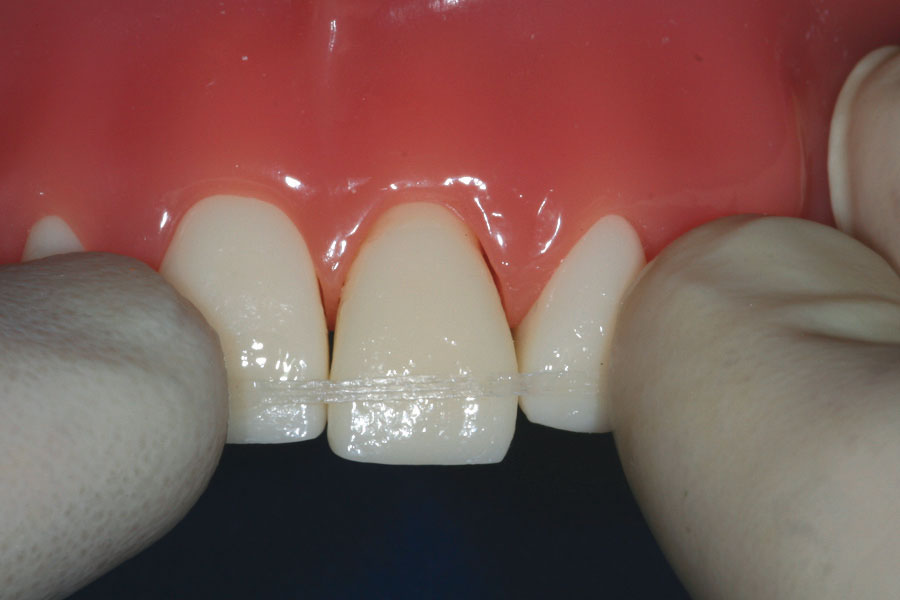
Press the Ribbond through the composite against the teeth. Maintain Ribbond taut in interproximal region. Do not allow composite in the interproximal region during placement of the Ribbond. Cure.
Step 9
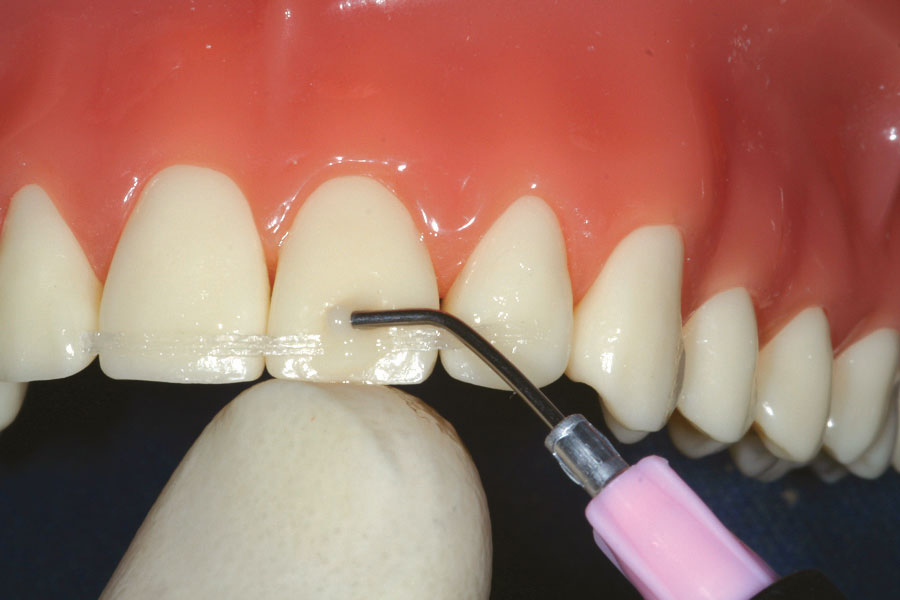
Reposition traumatized tooth and apply composite. Reposition traumatized tooth with your finger, and hold it in position as you attach the Ribbond to the traumatized tooth with composite. Press the Ribbond closely against the tooth and cure. Be sure to get no composite in interproximal region.
Step 10
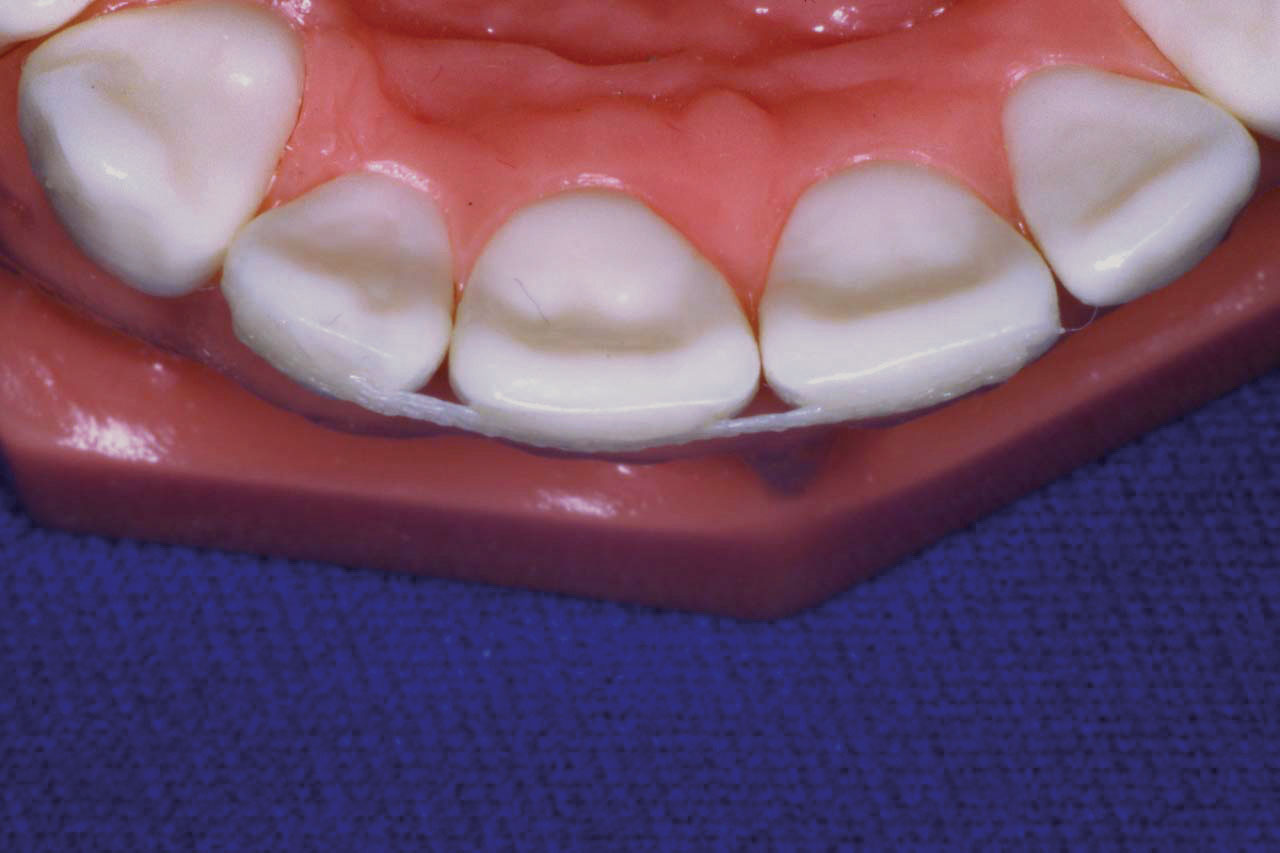
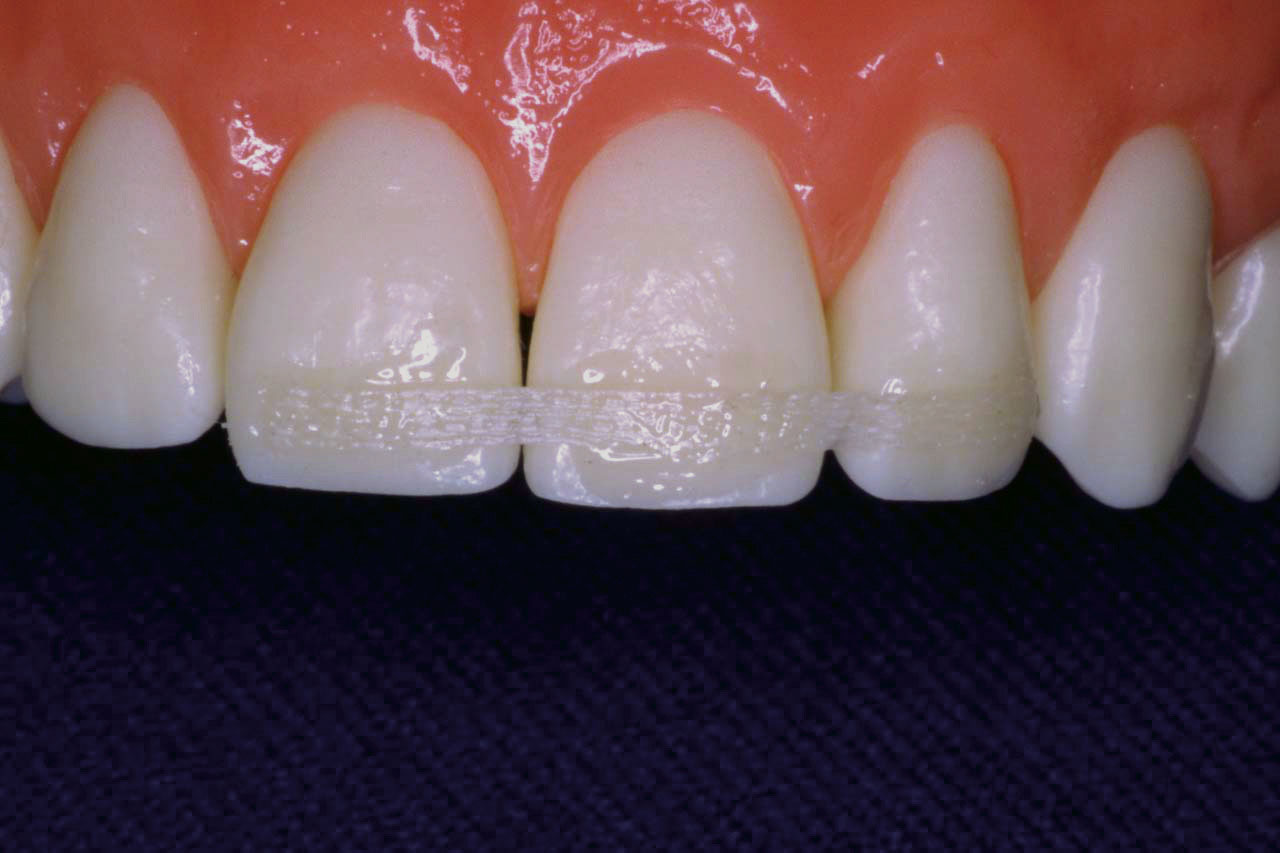
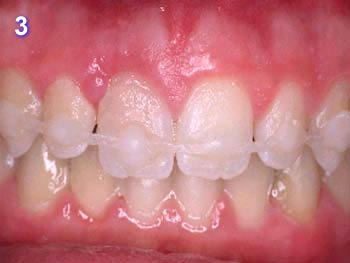
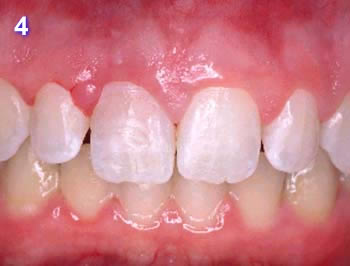
Completed truma splint. The finished splint is esthetic, thin, smooth, and non-irritating to the injured lip.
Step 11
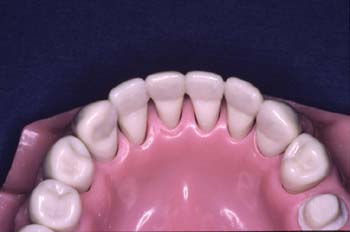
Check occlusion, finish and polish. Remove excess composite and polish with a composite-resin polishing paste.
Ribbond does not polish well.
Do not cut into Ribbond fibers.The finished splint is thin, comfortable and esthetic.
Provisional Bridge
Because Ribbond also bonds to acrylic and bis-acryl, it is commonly used for making reinforced provisional bridges. For longer-term bridges, multiple layers of Ribbond make a strong stress bearing laminate structure to act as a framework. For simple provisionals, one piece is commonly used to prevent cracks from propagating through the resin past the Ribbond. Although a crack may start, the Ribbond prevents catastrophic failure and maintains the integrity of the bridges.
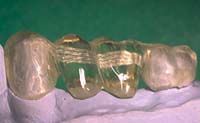
Technique
Step 1
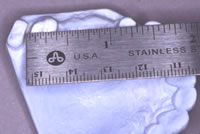
Measure distance between outsides of abutments.
Step 2
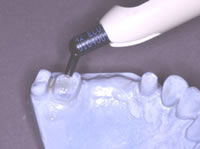
Place a thin layer of composite on preps for retention. Do not acid etch.
Step 3
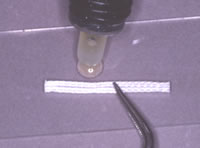
Wet Ribbond with unfilled bonding resin.
Step 4
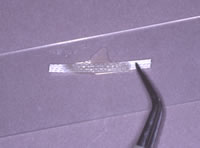
Wetted Ribbond changes from white to translucent.
Step 5
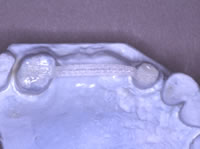
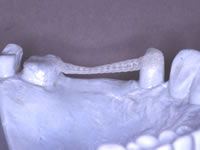
Push Ribbond through composite, against the teeth, and polymerize. If using acrylic, wet polymerized Ribbond with monomer.
Keep Ribbond towards gingival region in pontic.
Step 6
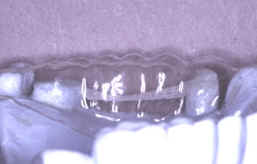
Confirm placement of Ribbond within vacuum formed matrix.
Step 7
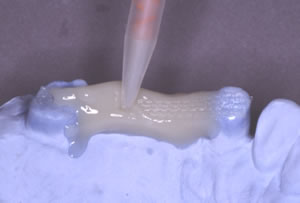
Inject provisional bridge composite gingival to Ribbond.
Step 8
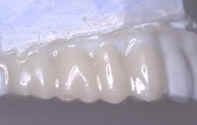
Place loaded tray over abutments.
Step 9
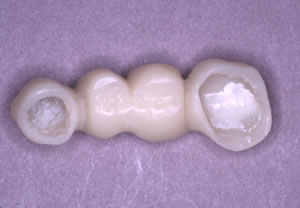
Ribbond visible on occlusal surface of abutments.
Step 10
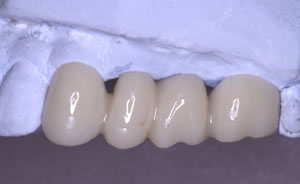
Composite provisional bridge Finished
Endodontic Post & Core
Recommended by many well-known lecturers, the Ribbond endodontic post and core technique minimizes the chance for root fracture and has the following advantages:
- Compared to preformed posts, there is no additional tooth removal after endodontic treatment. This maintains the natural strength of the tooth.
- Eliminates the possibility of root perforation.
- Because it is made when the Ribbond is in a pliable state, it conforms to the natural contours and undercuts of the canal and provides additional mechanical retention.
- There are no stress concentrations at the tooth-post interface.
- The Ribbond post and core is passive and highly retentive.
- Because Ribbond's translucent fibers take on the color characteristics of the composite it allows for the natural transmission of light through teeth and crowns. This provides an exceptionally esthetic result.
Technique
Other than the normal endodontic treatment, further shaping is not required to accommodate the size and shape of a preformed post. The following is a brief description of the procedure. The Ribbond instruction manual, included with a purchase, clearly describes this technique in full detail.
- Prepare the canal for normal dentin bonding.
- Inject a dual cured moderately filled composite such as a luting composite into the canal.
- Use the special Ribbond post and core instrument to carry the wetted Ribbond through the luting composite in the canal to the apical end of the canal.
- Apply composite to the protruding Ribbond ends and roughly form them into the shape of the core and cure.
- Build up the core with composite, cure it and shape it
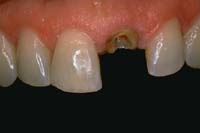
Before
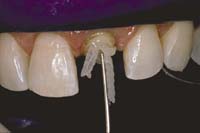
Condensing Ribbond into canal
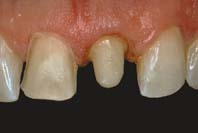
Finished core build up
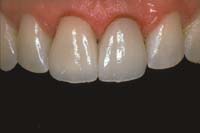
Finished with crown